
Tough as it is, drywall can withstand only limited abuse. If you open a door with too much force, it can slam into the wall, creating a make a doorknob-size hole into the drywall. This kind of damage looks bad, but is easy to fix. The simplest way is to purchase a drywall repair kit. Measure the hole, and visit your local hardware store or home improvement center for a kit, or buy one online. There are various sizes and types for different applications. For example, a drywall patch for a ceiling is thicker than one for a wall. Before you use the kit, remove any loose paper or plaster around the edges of the hole. Then apply drywall patch, following the manufacturer’s instructions.
In this article, we’ll tell you how to fix both a small and a large drywall hole. We’ll start with a small hole.
Fixing a Small Hole
To make a repair to a small drywall hole, about 6 inches (15 centimeters) or so, without a kit, follow these directions:
Step 1:
The first thing you need to do is get a piece drywall that is the same thickness as the drywall you need to fix. If you don’t have any at home, a hardware store will have smaller pieces that you can use. No need to buy an entire sheet.
Step 2:
Measure the patch. It should be large enough to cover the hole and then some. Give yourself a lot of wiggle room — about 2 inches (5 centimeters) on each side of the hole. You don’t want the patch piece to be too small. Next, cut the patch square from the larger piece. Turn the patch over and using a straight edge to score the paper back about an inch (2.5 centimeters) from each side with a utility knife. Don’t cut all the way through the paper or the gypsum. Next, snap off the loose drywall, but leave the loose paper on the back. Place the patch over the hole in your wall and use a pencil to trace it’s outline around the gypsum (don’t include the paper hang over when you are tracing).
Step 3:
Let’s clean the hole in the wall up. If you have a drywall saw, bully for you. That’s the right tool to have. If not, don’t worry. You can use that utility knife. Regardless of what blade you use, cut diagonal lines emanating from the hole to all four corners of outline you just traced. This will create a nice square opening. (You don’t have to cut diagonally to the corners, although it is easier. Just cut out the damaged portion of the drywall.) If you do cut diagonally to the corners, you’ll also need to score the outline of the square with the utility knife. Once scored, snap the pieces of drywall back, and then cut the edges with the utility knife and pull out the drywall so you have a nice, clean square hole.
Step 4:
Next, turn the patch piece face down and apply a thin coat of joint compound to the back of the paper using a putty knife. Turn the patch over. Put the patch over the hole, pressing down on the paper edges. Make sure it’s a secure fit. The joint compound will hold the patch in place.
Step 5:
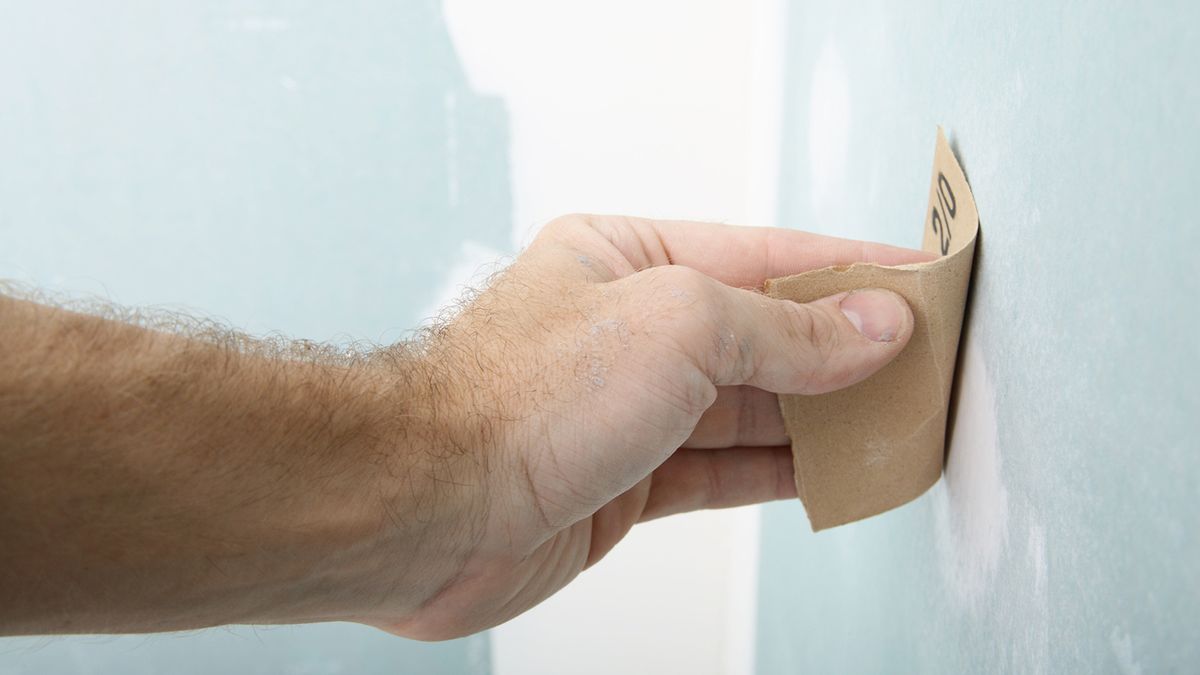
Finally, using a putty knife, apply joint compound on the patch, spreading it out on the wall, as well. It might take two or more coats of compound. It spreads easily, and well, is kinda fun to work with. When the compound dries, sand it smooth with a fine-grain piece of sandpaper. The patch is set for priming and painting.
Fixing a Large Hole
Let’s say the hole you have is pretty big. Maybe it’s a good-sized hole in a wall between two studs. Perhaps you hit the brakes a bit late and slammed into the back wall of the garage. No worries. You can fix it, too. And it’s relatively easy.
Step 1:
Cut out a large square piece of drywall that will fit between the studs. This will be your patch piece. Place the square patch over the hole, just like the instructions call for in repairing a small hole. Using a pencil, trace around the edges of the patch.
Step 2:
Use a utility knife to score along the lines you just traced. You don’t have to cut too deep. It will make the next step easier. Using a straight edge and a drywall knife — a utility knife is harder to use in this situation — cut and remove the gypsum from the damaged drywall. (Important safety tip: As you peel the drywall away, make sure you expose the studs.) Smooth the rough edges of the drywall with sandpaper.
Step 3:
Since the opening is between two studs, you can simply place the patch over them. Screw the patch onto the studs using drywall screws and a power drill.
Step 4:
Place a few strips of mesh drywall over the edges of the patch. The mesh will have a sticky backing, so it’s easy to apply. Cut the overhang with the utility knife. Next, using a putty knife spread joint compound over the mesh and heads of the screws.
Step 5:
Once the compound is dry, sand it down and remove any loose compound. The repaired wall is now ready to be primed and painted.
©Publications International, Ltd.
READ MORE
Royals Prove Inbreeding Is a Bad Idea
Feedloader (Clickability) Those jokes about inbred royals might have some basis in fact, according to [...]
Autonomous lab discovers best-in-class quantum dot in hours. It would have taken humans years
Schematic illustration of Smart Dope’s modular hardware, including the fluid delivery, X2-X9, formulation and reaction, [...]
See Seven Stunning Gold Paintings Inspired by the Brain
Inside the artist Greg Dunn’s Philadelphia studio, the acrid smells of solvent and dye hang [...]
Which Loan Is Best for Home Renovations: Personal, Credit Card or Home Equity?
Whether it’s new floors, a new room or just new windows and paint, there are [...]
Earth’s magnetic field formed before the planet’s core, study suggests
The oldest firm age yet for Earth’s magnetic field suggests that it developed before a [...]
Are Plastic-eating Enzymes Our Planet’s Only Hope?
Are two bacterial enzymes that specifically degrade PET plastics a potential solution to Earth’s massive [...]
5 Online Shopping Tips for Kids’ Clothing
If your kid is picky about colors, patterns or cuts, get them in on the [...]
The “Pompeii of Animals” Shows Dinosaurs, Mammals and Early Birds in Their Death Throes
Typical entombment poses of some of the Jehol Biota’s animals (a Psittacosaurus (a) and primitive [...]